Saturday 1 October 2011

Saris, Minerva and Indian Ink


Just a few things this week, been trying (and failing) to sort out paperwork for India. Sari studies above - this took about 3 hours.

Below are my 3D efforts from the past two weeks - practising for my first project of the third year at university - The brief is to replicate an artistic 3D sculpture, so I chose 'Minerva' from London's British museum.


Here's a photograph of the original - http://www.flickr.com/photos/ministry/4767647481/ Looking back on it, I see the nose of the sculpture is slightly more pointed. I need to find a better renderer and work further on texturing before I hit the real thing.


Got back in touch with a scanner after all these months, much more where these came from - I'm trying to fill an A5 sketchbook in two weeks!


Last week's lack of work was because I was wasting my time making a costume for Eurogamer and my leaving party. Learned new skills in the process, like how to dye faux leather with indian ink, how to make garments to fit and how to work with different types of materials. Not sure if this is related to game art but I had a lot of fun :D
It's game art in a different sense of the word. Don't think I want to go into costume making, but I got loads of free stuff and met cool new people!

Hopefully, HOPEFULLY off to India next week. My Visa came through but Ubisoft admin say it's the wrong type... Maybe next week I'll be stuck in immigration. We'll see.

Thursday 8 September 2011

Male Head, Tree, and More Practice


This head was the center of my attention for about 3 days - I was working on eyelashes when I hit my weekly deadline. On to the next one! Now I understand the process of baking normals from zbrush slightly better the process should be faster. I'd like to get the next one done to a presentable standard within 2 days.


This tree took about 2 days. I spent a long time trying to make the alphas work. Still need to watch more tutorials about this! Below is an edited version after crits from a very helpful coursemate :) I know it's still not great, and still looks like a 'fern tree', but at least I learnt a lot about alpha placement, and the next one will be better.


Bit more Zbrush practice, seeing how low poly I can go and still get general body shape. Making a new one this week because this one isn't too great and I need to work on the legs, maybe I'll make a man now. This was more about learning how to put the character in a natural pose.


For next week:
Model another game ready head (sculpture style marble, 'Minerva?')
Model another (male) low polygon character mesh.
Start on a Allosaurus model using Zbrush and Max (3 week time limit on this)
Another environment paint,
Painting from life

Sunday 28 August 2011

Head and sword models, digital paintings

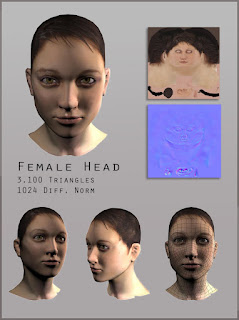
I've learned lot about character modelling this week making this head. The hair is not finished at all, this was just to practise sculting and retopologising. I've got some very useful feedback from peers on my course about how I could bring more subtlety to the features. I need to learn a better rendering software to show off my textures, and overlaying a photograph at an early stage of the sculpt will help me understand facial features and proportions better.


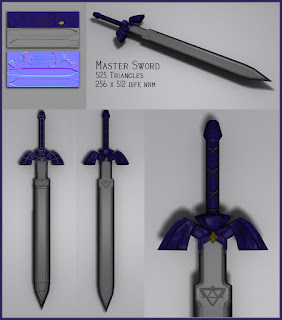
This was a one day project. I made the master sword as low polygon as possible with a small texture size. I wanted the normal map to have all of the detail and the diffuse to be very simple, but now I understand this is too simple. You should ne'er have a flat colour anywhere on your diffuse. Last time this willl ever happen!


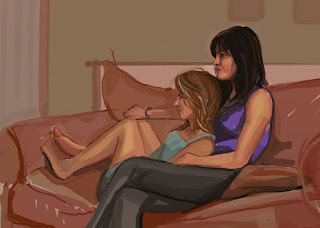
This is a painting from life, taking around 45 minutes. I found the foreshortening very difficult, and getting the likeness of people in such a short time is tough work! I plan to do more of these next week.


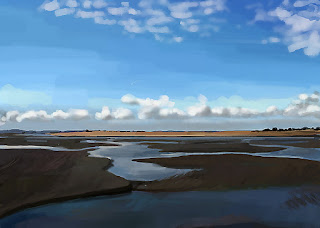
Quick speed paint, about 45 minutes. I'll ttry to do an environment paint a week as it's definitely one of my weak points.

Next week:
Model another game ready head with good textures,
Start working on a female body mesh,
More life painting,
One more environment painting (digital or watercolour)
Mid polygon model of a tree.

Thursday 18 August 2011

Sculpting Heads and Horses


Based on the Fawn in 'Pan's Labyrinth', need to learn hair and fur to add the final touches before texturing.

In reverse chronological order, here's some human heads I've made in Zbrush. Each one was completed in a day, I'm trying to get used to the interface and the tools which are available. I think I'm slowly getting there - just need to keep trying.

Attempt 3, shows I need to learn more about cheekbones and how the jaw line attaches to the neck.


Attempt 2, trying to learn Spotlight functions, it keeps crashing...


I find it interesting that no matter how many tutorials I've watched on sculpting the head, my own methods are completely different! I guess there's no right or wrong way to do it, you just need to keep trying until you find your own preferences. At the moment, it's learning the interface and tools available which is the hardest part of this process.

Working on finishing up this model of a famous horse from Ocarina of Time. I'd like to retopologize this to a game ready specification and texture it. The pose could use a little tweaking and it would look better if it was asymmetrical.


This sketch from life took an hour and a half. I think I made her feet too big, but maybe it's just foreshortening? Crits always welcome, thanks for reading :)


For next week:

Continue modelling heads, at least 3 more by next week.
Continue painting from life, try some environments too.
Finish Ganon's horse to a game ready standard with hair.
Make one low polygon model.

Tuesday 16 August 2011

Life Painting


Paintings from life using Adobe Photoshop. These two took an hour each. Look forward to the next upload - hopefully I will have finished all my 3D to a presentable standard by the end of this week, and I've signed up to life drawing classes for three days!

Wednesday 3 August 2011

Graveyard Shifts

Night shifts and monotonous work in a factory have been taking over my life recently, so regretably game art has been pushed to the sidelines for a while. Hopefully by next week I'll be back into it, I miss it so much!

As I've been working the graveyard shifts, I've been making disembodied parts of people for practice. I made this eyeball in about 4 hours. I think they can be the most important part of a character model and I'd like to avoid that horrible dead eyes look that most of my characters so far have had. I spent a lot longer than usual trying to understand the anatomy and specularity.

The cornea, iris and pupil have been given seperate materials to correspond to how they react to light. This model comes to 304 triangles, but a lower polygon equivalent shouldn't be too hard to make. The colours of the pupil are easily interchangable, and the texture map for the eye white has tiny veins painted on too.


I'll use similar eyes in my character I'm starting this week.

Now on to my hand project. They're bloody hard to understand! Here's the final result:

And here's some progress shots. I attempted to model the hand in a more relaxed position so it animates easily. The thumb actually takes up about a third of the palm so I tried to take this into account.


2D these two weeks has involved making the most of the new laptop, now I can actually do life drawing wherever I like.


I find it difficult to draw people when they keep moving! I need to keep these up until I understand how to use the swatches and colours well in photoshop. Its good practice and I really enjoy it, should help me understand proportions, colour and light.

Next Week:
Continue with the life drawings, at least two by next Thursday.
Finish rigging and rendering super low poly ostrich.
Start modelling another head in Zbrush, if it looks bad do another from scratch.
Model Ganondorf's horse (Legend of Zelda) using the horse I've already made as a base.

Thursday 14 July 2011

Sketches, Tree Frog and the Horse


Here's the result of my one day project, the tree frog. I don't know how well this would animate and suspect I would need more edge loops around the back legs, but I can't find a suitable rig to test it. I'm quite happy with this but it's slightly too high poly for what I was aiming for. Next week I'm going to attempt some very low polygon modeling.


Some sketches in pencil of various bits of my person! These two took 30 minutes each. I hope to model a hand using Max and Zbrush so I hope similar sketches this week will help directly inform my 3D work.

Now for some sketches of friends, these took 20 minutes each.

And the final image is made up of 2 minute sketches using a fineliner.

Quick 30 minute speed paint from life

For 3D this week, I textured the horse using my normal map as reference.


And then I rigged it using CAT in 3DS Max. I still can't get those feet right, they were a nightmare to rig. I need to work further on rigging and watch more tutorials as there are a lot of problems with stretching and popping:

Okay so for next week,

1. Model and unwrap, perhaps texture a human hand.
2. Continue with sketches
3. Photoshop Painting
4. Work 9-5 Monday to Friday... don't expect a submission in time for Thursday next week, maybe around Sunday!

Thanks for reading as always, criticism is greatly appreciated :)

Wednesday 6 July 2011

Newt, Sculpey and the Horse

Prep work for this week's deadline, to model Newt's head before next Thursday. Another character with a very pronounced jaw... so damn difficult to understand neck topology. This took about 2 hours in photoshop.

To help me understand skull anatomy I made this bust in sculpey. It was useful to sculpt the face with something physical and has been valuable in helping me understand the structure of the neck, jaw and cheekbones.

It was originally meant to be based on Sigourney Weaver, but I have enough trouble making things look human in ceramics, let alone sculpting someone who is so easily recognisable. This hasn't been baked so I'm going to mash it up and make a new and hopefully better version.

I also did some sketches of friends using graphite, fine-liner and 4h pencil. I'll upload these on Saturday as I don't have access to a scanner.

Now on to this week's main project, to model, unwrap and rig a horse. Here's some progress shots:
Basic mesh modeled from reference image.

Progress of sculpting geometry in Zbrush. I used books such as 'An Atlas of Animal Anatomy', which is fantastic, alongside physical 3D statuettes for this stage. Because no photography was involved I found it much easier to understand the subtle forms of the animal in the skeletal and muscular structure.

Progress shots of the very dull retopologising process in Zbrush. I managed 6,600 triangles which is pretty good for a current gen horse model.

Unwrapping retopologised model in 3DS Max.

Looking back at this week's work, I'm disappointed that I couldn't stick to my deadlines, but I decided to spend a lot of time on the horse model to make the topology really good with a minimal triangle count. I had to start this model several times again before I was happy with the proportions. I've improved my unwrapping skills, and I'm starting to understand Zbrush a little better.

Next week:
Finish rigging, texturing and posing the horse model.
Make a start on Newt's face.
Start on Ripley's hair, finish her head.
Model, unwrap and texture a super low poly frog, in one day.
Do more paintings of people and more pencil sketches.

Thanks for reading, crits are always welcome :)

Thursday 30 June 2011

Ellen Ripley

This week's project was inspired by the new title by Gearbox, 'Aliens, Colonial Marines'. The game looks great and the models are fantastic, but check out this screenshot-

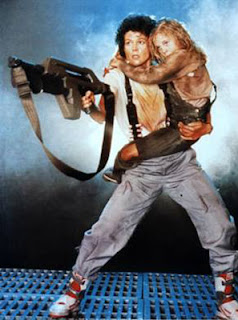
Battle hardened marines anyone? I think I've seen these before somewhere. What made the Alien franchise so appealing to me was characters like these:

This game is being called advertised as a true sequel to the Alien series, so I hope it's got some good female characters in it. All I've seen from screenshots so far are male soldiers, but I'm crossing my fingers for the rare opportunity to play as a female character, even just in multiplayer!

I'm trying to make my own current generation model inspired by 'Aliens'. I'm giving myself one month to try to replicate this image in game ready 3D, rigged textured posed and rendered.

What an icon! The M61a Pulse Rifle was completed last week.


I started by studying Sigourney's face and making quick references of her facial landmarks like her very pronounced jaw and cheekbones.

Then went on to produce a photoshop painting, this took 2 hours and was valuable in understanding the shape of her nose.


Painted topology over a photograph.


Quickly blocked out a head mesh using 3DS Max and the topology reference, then put the mesh into Zbrush to check proportions after adding sockets for the eyes and mouth.


Fixing the topology, trying to get rid of the majority of triangles. This is the first time I saw a hint of Ripley in this model. Adding eyelashes really does make a difference, even at this basic stage. I noticed that her eyes looked a little too large when the texture was on so I worked to make them look more human.


So far this is a WIP model, I'm going to keep coming back to it as I model the rest of her body. The 3/4 view looks a bit off, her nose is wrong and her eyes are still quite creepy. I need to finalise the textures and build up a good normal and specular map, then get started on the hair.


Next Week:

Start on prep paintings for Newt's face and finish Ripley's. I've never made curly hair before!

Model, unwrap, rig and pose a horse. Maybe do some basic texturing on it if there is any time. I failed to make my little creature this week so need to pick up the pace. Crits welcome :)